Table of Contents
Setting up a large party tent properly and using the right securing methods is the best way to ensure an amazing event and outdoor venue space, no matter what kind of event, market, or gathering you are planning. While it might seem intimidating to set up a large event tent, it’s actually quite simple when you understand the basics.
Here at American Tent, we are proud to help our customers with every part of their event tent ordering and use, and in this guide, we will break down the basic steps on how to set up any style of a large party tent. If you are looking for a specific set-up guide, refer to our resources here. From setting up and securing your event tent, to tear down, storage, and ensuring your tent will last for years to come, here’s all the information you need!
Key Steps
Every event tent style requires a slightly different set-up and tear-down process that can be very simple or require multiple helpers to set up the tent. We will enumerate how to set up a party tent, including frame tents, pole tents, and pop-up canopies, but in the meantime, here are a few overall guidelines that are true for every event tent.
Tip: Always be sure to call Diggers Hotline (8-1-1) well in advance of your set up. We recommend at least a week. It’s very dangerous and a huge risk when you stake into the unidentified ground. Make sure you know where gas, electrical, water, and cable lines are before you start.
How Long Does Setting Up An Event Tent Take?
The set-up time required to properly secure your event tent will depend on the size and style of your specific tent. A small, 10x10 pop-up tent is made to be extremely easy to set up and transport, and can easily be set up with just one to two people in a matter of minutes. Even smaller-sized frame tents can be set up quickly with a crew who knows what they’re doing.
Mid-sized and larger tents are, of course, going to require proper planning as they take a bit longer to set up. American Tent products are made with high-quality, intuitively designed materials to be set up and torn down as simply as possible while still being secure in harsh weather conditions.
So, while a large event tent will take more time to set up, everything has been engineered with you in mind, making the process as simple as possible. Something like a mid-sized 20x30 frame tent can be set up in less than an hour with our recommended six-person crew to help out and properly secure the tent.
In the case that you are planning a large outdoor event and are setting up a large event tent, you will need ample time and a proper set-up crew to set up your frame or pole tent. A large tent can take multiple hours to properly set up and secure with the right weights.
Tip: First time using your event tent? Our American Tent experts highly recommend you lay out your tent and do a test run to see how the setup process goes. This is especially important for large tents that are going to require proper planning and forethought on your entire setup crew’s part to ensure your tent is set up properly and on time. This can help you figure out the process and see where you might be going wrong so that you and your crew can iron out all the kinks before the day of your event.
Instruments & Materials You’ll Need

There are various tools you can use to set up your event tent. Not all are required, but everything on our list makes helpful additions for your event tent setup crew, whether you’ve got a team of 20 or just yourself.
If you are setting up a small to a medium-sized tent, you can likely set it up easily in a short amount of time, and simply need the basics to set it up. But if you’re setting up a large-scale outdoor venue with a large event tent, you might want to look into some helpful tools.
- Frame tent jack - If you’re setting up a large event tent and want to expedite the process, a frame tent jack can assist in your party tent assembly by raising your tent in the air to make putting the legs on far easier. Instead of hiring a whole crew to help you, this can make it easy enough for a single person to set up the event tent this way.
- Center pole puller - Pole tents are gorgeous, but that pesky center pole can tend to get in the way during the setup process. A center pole puller will help you erect those pesky center poles and make setting up your pole tent easier.
- Tent stake extractor - The last thing you want to do after a long event is struggling to take your event tent down. The tent stake extractor makes this process easier by assisting in removing the stakes for your event tent when it’s time to tear down.
- Large tarp - An inexpensive tarp or drop cloth can help you layout a barrier between your high-quality canopy top and the ground, protecting from grime as well as small holes and tears. We recommend using a drop cloth or tarp every time you set up your event tent.
- Tent weights/stakes - Securing your tent is extremely important after setting up, even if you are in a mild environment and are not expecting any high winds or heavy rain. An airborne tent can be extremely dangerous, so take the proper precautions and either use stakes or tent weights to secure your tent.
Not every tent will be able to be held down with the same amount of weight. The recommended amount tends to be 40 lbs on every corner of your tent, but this is only for smaller-sized, personal outdoor tents. If you have a large event tent that more easily becomes airborne in high winds and has more surface area to hold down, you’ll want to use more weights. Need more info on properly weighting your tent? Read our full guide here.
How to Keep Your Event Tent Looking Great
While this guide is all about setting up your event tent, taking down and storing your event tent is just as important to hosting an amazing outdoor gathering and keeping your guests comfortable and happy with a gorgeous, high-quality event tent.
The key to a great-looking tent is ensuring you’re taking proper care of the canopy and frame both in the set up and tear down process, as well as when you clean and store your event tent. Upon disassembling your tent, our American Tent experts highly recommend you properly clean off your tent before storing it.
Yes, even if your event tent stays clean and free of stains, dirt, mud, and other debris, it is still a good idea to lightly clean off your event tent. This can be done simply by brushing off your tent and then using a cloth damp with water and dish soap to wipe down the canopy.
After rinsing your tent, you’ll have the perfect opportunity to check your event tent for any small rips, tears, or holes that may have been too difficult to spot before, because air bubbles will form around the water in any of these spots.
Once your tent is properly cleaned, always make sure it is entirely dry before folding and storing. Even though American Tent products are waterproof and resistant to mildew and rust, mold can still form on your tent and water damage will impair the overall look and quality of your tent.
How to Set Up a Frame Tent

When it comes to setting up specific event tents, frame tents are luckily some of the most simple tents to set up. Here’s a simple, condensed version of our guide on how to assemble a frame tent.
Step #1. Lay Your Frame Tent Out On The Ground
With so many necessary parts, you’ll want to start out your tent setup by layout out your entire frame on the ground before you start putting anything together. This way, you’ll be able to envision where everything goes and how it will all work together when you’re setting up, and you’ll be positive you have every part you need to get started.
Step #2. Connect Tent Pins And Crowns
Crowns at the peaks of your tent canopy will hold the pins in place, which you can put together by fitting the pins in correctly. This is the first step in the process of fitting your frame together.
Step #3. Build Your Frame Top
You will need to follow a thorough step-by-step guide for your specific tent that will diagram how to put your tent together. You will build your frame top by connecting tent fittings and tubing and building up your frame top to create a strong and secure base for your tent. This will also include securing ratchet straps to the tent frame, and other securing steps like this.
Step #4. Lace Tent Together
Using a drop cloth or tarp to ensure you don’t dirty or damage your tent top, roll out the canopy top and align the lace side with the grommet side. After lacing these sections of the canopy together, make sure you close the rain flap and ensure everything is secure before cutting the lace line and repeating for your entire tent canopy.
Step #5. Attach Your Tent Top
Pull your tent top over the frame center the tent top on the frame. Once your tent top is properly situated on your frame, fasten the alligator straps to each of the tent's corners and attach the base plates to the legs of your tent.
Step #6. Attach Stakes And Secure Tent
Finish securing your tent by adhering ratchet clamps to stakes in the ground around the perimeter of your tent, as well as going through and tightening the rest of the straps around the inside of the tent. Even if you are expecting good weather conditions, properly securing your tent with stakes or weights is essential. Even in low winds, your tent can go airborne if you don’t properly secure it before your event.
How to Set Up a Pole Tent

Pole tents are similar in style and set-up requirements as frame tents, though they do tend to be slightly more technical to set up with the large central pole, peaks, and more.
One of the biggest differences between a frame tent and a pole tent is that frame tents can be set up on concrete, grass, and just about any other flat surface, since they don’t require being staked into the ground. Because pole tents utilize stakes to secure their canopy tops, they are best suited for setups on soft surfaces such as grass, dirt, gravel, etc. Here are the basic steps required when setting up your beautiful, outdoor pole tent!
Tools Needed for Pole Tent Installation
Want to know how to put up a tent as easily and efficiently as possible? Invest in the right tools to help you in your tent setup. Here are the essential tools needed for your pole tent installation:
Large tarp - for spreading your tent canopy on instead of the ground and/or dirt
Tent stakes - to properly secure your tent canopy
Stake driver - to efficiently drive stakes with less effort
Center pole puller - to raise the center pole with less time and effort
Step #1. Lay Out Your Tent
Like a frame tent, you can start your party tent assembly by layout out your pole tent top, as well as the poles and materials you’ll be using, so you can get a good sense of where everything will go and if you have all the proper tools before you get to work.
Tip: American Tent always recommends using a drop cloth, tarp, or other protective material on the ground during this step so your tent canvas is protected from dirt, rocks, and other grime that can keep your tent from looking its best.
Step #2. Set Up Your Tent Stakes
Stakes are how the canopy of your pole tent will stay secure. A stake driver will make the process of installing your stakes easier, but it isn’t absolutely necessary.
To properly install your tent stakes, position them about 5’ from the edge of your tent at each grommet. Your stakes should be driven 36" into the ground, leaving the top out. This is what you will use to attach the canopy to by tying the corresponding ropes to the stakes.
Tip: Ensure you keep the ropes loose during this part of your canopy tent installation process. This will ensure your tent can move easily as you erect the poles and canopy.
Step #3. Raise Side Poles & Corners
Begin to create the shape of your tent by inserting side poles into their corner slots, leaving the bottom of the side poles slanting to the center of your tent.
Step #4. Erect The Central Pole
The central pole is what makes the magic happen in your pole tent! At this step, it’s time to inert the central pole into the center grommet of your pole tent.
Tip: Central poles can be difficult to set up because of their large size and weight, especially if you are setting up your pole tent with a small crew. This is a great opportunity to utilize a center pole puller, as mentioned above, which can help you make this step a breeze.
Step #5. Secure Poles & Ropes
Once your central pole is set up, you’re only a few steps away from having your pole tent set up and ready for your amazing event! Inset the remaining side poles around your tent and tighten them to an upright position. Congrats-- now your pole tent is raised!
Once everything is in its proper upright position, you’ll want to tighten your rope and make sure it is taught. Everything should be upright, tight, and properly secured with no slack in your tent rope.
Tip: Can’t get your tent rope to pull taught and secure? Don’t worry - you don’t have to start the process over entirely. Takedown and slant your tent poles toward the center of the tent again and retie your rope, tighter this time. When you erect your tent again, the rope should be taught and secure.
Do You Need Weights For Your Pole Tent?
With the importance of properly securing your event tent, you might be wondering if you need weights for a pole tent. Because this style of tent is already staked into the ground, you have actually already secured your tent against high winds and rain!
Pole tent stakes should be secure and set up properly in the beginning, as they offer the security and support your pole tent needs to keep your guests dry, comfortable, and having the time of their lives inside your gorgeous event tent!
Can a Pole Tent Be Set Up On Concrete?
How to set up a pole tent on concrete? If your venue doesn’t include a grassy spot, it is technically possible to get your pole tent set up. However, this process includes drilling down into the concrete or asphalt where you are setting up a party tent to properly secure your tent. It’s noisy, messy, and damages the material you’re drilling into, which can end in costly repairs and fees.
Our experts at American Tent highly recommend you invest in a frame tent if you know you won’t be able to easily stake into the ground at your venue. While it’s possible to drill down into the concrete and secure your tent, it obviously includes structural damage to the concrete and is extremely time attentive and physically challenging. In most cases, a frame tent can do the job perfectly.
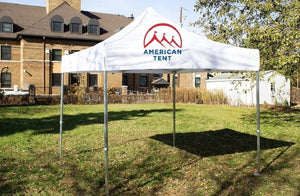
How to Set Up a Canopy Tent

Canopy tents, also known as pop-up tents, are as simple to set up as their name suggests. These smaller-sized tents are perfect for small or spread-out events and markets and feature folding frames that are a breeze to set up. For more detailed instructions on how to install a canopy tent, keep reading!
Step #1.Pull Your Tent Top Over The Frame
Prop the frame of your pop-up tent upright in the standing position, but not pulled apart yet. While the frame is still closed together like this, take your tent canopy and pull it over the frame. Set up your canopy and make sure to align the peak of the tent top with the center of the frame, getting the fit right before getting your frame ready to pull out and pop up.
Step #2. Pull Apart The Tent Legs
Once your tent canopy is aligned and in place, set up your pop-up event tent simply by pulling apart the legs. For a small canopy tent, this can be done with two people going around the tent and pulling apart opposite leg corners. With a larger tent, enlist multiple helpers to grab the frame legs and pull the frame apart, popping up the inner mechanism.
Step #3. Push Up On The Center Mass Until The Frame Clicks Into Place
You will pull your tent frame apart until the frame clicks into place. Once your frame is in place, ensure every pin has been secured in its pinhole, or you might face problems with your tent coming undone or getting blown away later in the day.
Step #4. Adjust The Height Of Your Tent
Every leg of your canopy tent will have adjustable pin holes and pins that you can push in and then slide up or down to adjust the overall height of your event tent. Ensuring that every leg is set to the same height, click your legs into place and your frame will be ready to go.
Step #5. Secure The Tent Top Velcro
Once your entire canopy tent frame is set up and the canopy top has been loosely secured, you’ll go around and secure it further. Thread the velcro straps through the holders on the frames, pulling through and tightening before fastening to the other side of the velcro strip. Tightening the straps along with the interior of your tent and ensuring everything is secure.
Once your canopy top is secure and your tent has been properly weighted or staked down, your canopy tent is ready to go!
How to Put Party Tents Together
If your party tent setup includes multiple tents, you can create the oversized, multi-tent venue of your dreams, or even create one large mega-tent! But how do you connect two party tents?
Connecting tents can be quite simple if your tents are the same size; simply connect frames and eliminate sidewalls on any passway through tents.
You can also get creative by putting smaller canopy tents inside a larger frame or pole tents to create different sections within your venue, or even create canopy/tarp ‘hallways’ between tents of different sizes and styles that don’t fit easily together.
Frequently Asked Questions
How long does it take to set up a tent?
How much weight do you need for a canopy tent?
How to take a tent down?
How to store your tent?
Conclusion
Your party tent assembly doesn’t have to be stressful or difficult! We hope this guide and our insider tips help give you a comprehensive look at setting up any kind of event tent. If you have further questions about setting up, tearing down, or caring for your event tent, or you have any other questions about ordering and owning an event tent, our customer support team here at American Tent is here to help! Contact us today to find the perfect tent for your event!